
 Início
 》》》》》》》
1 Tutorials ZBrush Making of the Angelina Jolie Dom Jan 30, 2011 10:20 pm
Admin

Admin
by Antonio Bonora alias Lumacone10, Italy
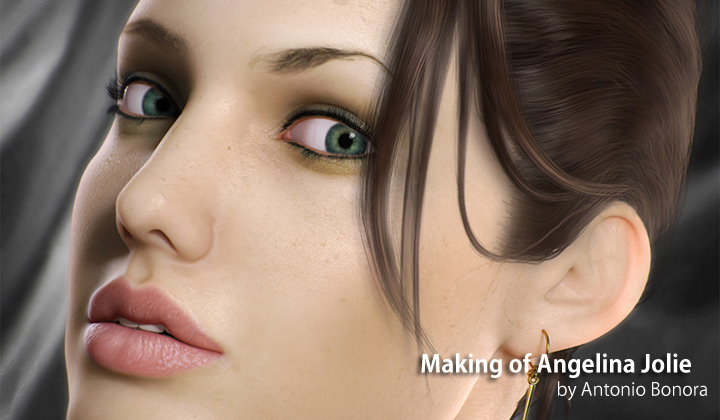
After having collected some pictures of the famous actress Angelina Jolie, I decided to use some of them for giving life to my homonymous creation Angelina Jolie. Before starting the phase of modeling
it was important to take a moment to observe properly the features of
this beautiful actress, above all of her cheekbones which are very
particular and pronounced.

Starting from the two references, front and lateral view, I modeled the lowpoly face, imported into ZBrush and increased the subdivision level by 2 steps.
Then, I could concentrate on adding details to critical areas of morphology
like mouth, nose, bowed eyebrows, eyes and ears. During the working
process, I pay attention to maintain a clean and morphologically
correct mesh and to avoid disharmony, in order to permit an efficientmodeling in ZBrush without too many difficulties.
I added loops only on the more important areas, to have a more manageable mesh for the modeling.

As
you can see, I added only one additional iteration, obtaining a density
which satisfied me. I obtained the bump map from the diffusion texture.

Having completed the model, I imported it in
3ds max, where I rigged the head and neck to pose the subject with a
simple rotation of the head. In the end, I've put the camera and
chosen a typically portrait view, I added a leather string in order to
render the idea that the woman is wearing a dress.


For
the shading, I was inspired by various tutorials I had found on the
web. I also studied how the various slots work in order to obtain a
realistic skin. Here are my sss fast skin settings:


For the illumination I considered various photographical techniques, and put the primary
light between camera and subject (45°), slightly moved to her righter
side. Then, I added two backlights to emphasize the silhouette of the
face and to obtain more depth for the final image. Finally, I added a
fill light to compensate the dark areas.

For
the final render I decided to use Mental Ray as my render engine,
already integrated in 3ds max and using only final gathering and not
the global illumination. In the settings of the FG, I used 0 bounces to
obtain a low render time, compared to the SSS fast skin complexity.

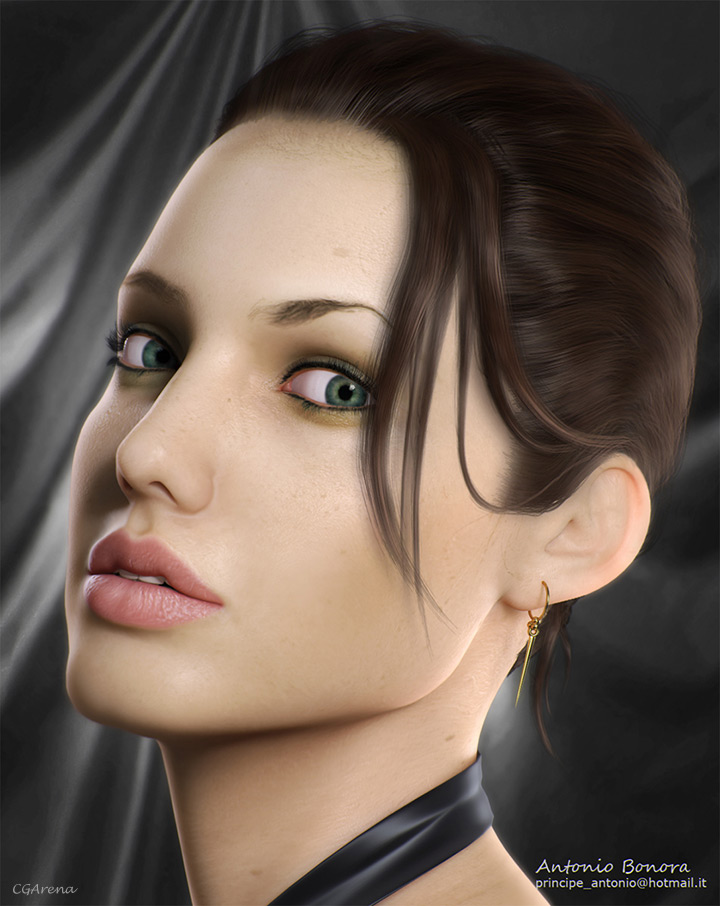
So,
I rendered a beauty pass of the scene. I created a composition in
Photoshop that permitted making last substantial changes to the final
image. As background I added an image of a curtain
that I had turned black before. I made the hair with the Hair and Fur
modifier, and rendered it separately. So, I composed the hair and the
beauty pass with Photoshop to obtain the final image.
Hope you like this image and thanks a lot for reading this overview of
the image. If you have any queries then don’t hesitate to ask.

]
After having collected some pictures of the famous actress Angelina Jolie, I decided to use some of them for giving life to my homonymous creation Angelina Jolie. Before starting the phase of modeling
it was important to take a moment to observe properly the features of
this beautiful actress, above all of her cheekbones which are very
particular and pronounced.
Starting from the two references, front and lateral view, I modeled the lowpoly face, imported into ZBrush and increased the subdivision level by 2 steps.
Then, I could concentrate on adding details to critical areas of morphology
like mouth, nose, bowed eyebrows, eyes and ears. During the working
process, I pay attention to maintain a clean and morphologically
correct mesh and to avoid disharmony, in order to permit an efficientmodeling in ZBrush without too many difficulties.
I added loops only on the more important areas, to have a more manageable mesh for the modeling.
As
you can see, I added only one additional iteration, obtaining a density
which satisfied me. I obtained the bump map from the diffusion texture.
google_protectAndRun("ads_core.google_render_ad", google_handleError, google_render_ad); |
Having completed the model, I imported it in
3ds max, where I rigged the head and neck to pose the subject with a
simple rotation of the head. In the end, I've put the camera and
chosen a typically portrait view, I added a leather string in order to
render the idea that the woman is wearing a dress.
For
the shading, I was inspired by various tutorials I had found on the
web. I also studied how the various slots work in order to obtain a
realistic skin. Here are my sss fast skin settings:
For the illumination I considered various photographical techniques, and put the primary
light between camera and subject (45°), slightly moved to her righter
side. Then, I added two backlights to emphasize the silhouette of the
face and to obtain more depth for the final image. Finally, I added a
fill light to compensate the dark areas.
For
the final render I decided to use Mental Ray as my render engine,
already integrated in 3ds max and using only final gathering and not
the global illumination. In the settings of the FG, I used 0 bounces to
obtain a low render time, compared to the SSS fast skin complexity.
So,
I rendered a beauty pass of the scene. I created a composition in
Photoshop that permitted making last substantial changes to the final
image. As background I added an image of a curtain
that I had turned black before. I made the hair with the Hair and Fur
modifier, and rendered it separately. So, I composed the hair and the
beauty pass with Photoshop to obtain the final image.
google_protectAndRun("ads_core.google_render_ad", google_handleError, google_render_ad); |
Hope you like this image and thanks a lot for reading this overview of
the image. If you have any queries then don’t hesitate to ask.
var addthis_pub="cgarena";  | Rate this Making- | <table class="js-ratings-tableWrapper" border="0" cellpadding="0" cellspacing="0"><tr><td>18 votes </td></tr></table> |


